Last Day to Get Share Sunshine Paper Pumpkin Kit

Today is the last day to subscribe to Paper Pumpkin and get the Sara Douglass-inspired Share Sunshine kit!


Box of Sunshine

  • Kit contains supplies for 8 cards and envelopes (2 cards of 4 designs)
    • Card size: 4-1/4" x 5-1/2" (10.8 x 14 cm)
    • Envelope size: 4-1/2" x 5-3/4" (11.4 x 14.6 cm)

Coordinating Colors: Basic Black, Bumblebee, Crushed Curry, Poppy Parade, Shaded Spruce, White, and Gold

Box of Sunshine Information: This kit includes extra pieces and stickers (including a sticker label) to help you create cards AND a Box of Sunshine filled with treats and goodies to send to a friend. (Treats not included.)

Once you've made your cards, you'll have a pretty box you can decorate, fill with goodies and give to someone else to bring some sunshine in their life (and we all need some sunshine in our lives)

Here is a video you can watch about this kit:  https://www.youtube.com/watch?v=Og8A3NL2aeg&feature=emb_logo

Subscribe at http://bit.ly/PaperPumpkinSubscribe

New Catalog LIVE Today!


I just love a new catalog!  And it is now live!  Due to the virus and slowed shipping many of the items in the catalog are already nearing backorder status.  Stampin' Up! couldn't predict that we'd all be stuck at home crafting our little hearts out so they didn't have enough stock on hand.  BUT it is getting better and hopefully, you'll be able to get what you want.  Ordering will be turned off until noon MT to allow SU to load everything into the computer.

The new Emboss & Cut machines are not available yet and won't be until sometime this summer.  I will let you know when.

There's new adhesive--Instead of our snail there is Seal and Seal+.  The seal is like our snail and the Seal+ is stronger for those projects that need a little more hold (or if you live in the South like me and high humidity wreaks havoc with adhesion)

Just a reminder that shipping is much slower due to social distancing in the warehouse


There are 2 great specials during the month of June:

  1. Extra Host rewards!  Order at least $250 (you can host a party online, get your friends together to place an order together, ask for a host code and allow your friends and family to order using that) and you get an extra $25 in rewards.  So on a $250 order, you'd get $50 instead of $25.  And the more you order the more your rewards.  Rewards = FREE STUFF!  This ends June 30.


  1. Purchase a Starter Kit at $99 (with free shipping) and get to choose $125 in products (this is always a great deal) PLUS you get to choose a FREE bundle (stamp+dies or stamp+punch).  With the most expensive bundle at $57.50, the value of your kit (which includes a Paper Pumpkin kit and business supplies, including catalogs) can exceed $225!  There is no further obligation beyond the purchase of the kit unless you choose to continue and receive 20% discounts on all future purchases.  You'll have until the end of October to make that decision (and the fall mini catalog will be coming out by then!)  I would love to have you on my Ink Spot Inkers team!  You can check out all the benefits of joining with this link.  This promotion ends June 30.


Also new is the Beginner BrochureThis is designed for the beginner stamper but is available for all.  There is something for everyone in this brochure.  You can purchase an entire group of products (stamp set, ink spots, adhesive, clear block, cards and envelopes) so you can start stamping and creating immediately with all that you need.


Have fun with your new catalog and enjoy!

Forever Fern Sympathy Card

Making sympathy cards can be so difficult, especially if you are trying to make them while emotional about the reason behind the card.  Make sympathy cards ahead of time and keep them until needed and it will be easier.  I used up all my stash so needed to make this one.  I love how it turned out and the recipient was very appreciative of it.  This card uses mostly new products and features a fun-fold.


Supplies:

  • Stamp Sets – Forever Fern (152559); Peaceful Moments (151595); Inspiring Iris (149268)
  • Card Stock – Pear Pizzazz (131201); Pretty Peacock (150880); Whisper White (100730)
  • Stamp Pads – Pretty Peacock (150083)
  • Misc. – Forever Greenery (DSP)  (152492); Greenery Embossing Folders (152716); Tasteful Labels Dies (152886); Ornate Layers Dies (152726); Dimensionals (104430)

Measurements:  

  • Pear Pizzazz:            8 1/2” x 5 1/2”                       
  • Pretty Peacock:        3 ¼” x 4 ¼”      scrap for sentiment backing
  • Whisper White:         5 1/2” x 2 1/2”                                   scrap (sentiment)
  • DSP:                           3” x 4”            

Instructions:

  • Score the Pear Pizzazz card base at 4 ¼”.  Cut off 1 ¼” off the front.
  • Emboss the smaller front using the Forever Greenery embossing folder.
  • Stamp the front sentiment on Whisper White using Pretty Peacock ink.  Die cut using the Tasteful Labels die
  • Die cut the Pretty Peacock backing for the front sentiment and layer onto back of sentiment piece
  • Die cut the larger whisper white piece using the Ornate Layers (see photo of inside of card)
  • Cut the DSP and layer onto the Pretty Peacock piece.  Add to the front of the card by using adhesive on only half the piece since it will hang over the card front.
  • Adhere the sentiment piece to the front.
  • Stamp the sentiment onto the larger Whisper White die cut piece for the inside of the card.  Stamp floral piece at bottom.  Attach to inside of the card so it doesn’t show.

 All of the products used are in the new catalog coming tomorrow.


Product List


Final Days

Tomorrow is the very last day to order from the current Mini catalog and the annual catalog!  If there is anything you want, you need to grab it NOW!  Some items might show up on the Clearance Rack later but stamp sets rarely do!  


shop 24/7 at http://bit.ly/ShoppingwithBeckyTaylor

Remember that most bundles do NOT carry over to the newest catalog.  So if there is a bundle you like, get it now and save 10%!

Leave A Little Sparkle Birthday Card

My granddaughter is turning 8 so, of course, I needed to make her a birthday card!  I decided to use the stamp set Leave A Little Sparkle.  I love this set and sadly, it is going away.  If you want to get this set, you need to hurry because it's guaranteed only until the 22nd!


I found a card on Pinterest that was similar and liked how it looked. 

The base is Whisper White Thick.  The next layer is Whisper White cut to 5 1/4" x 4".  I wanted a rainbow effect so I sponged (using my makeup brushes) colors onto the card.  First was Flirty Flamingo, Highland Heather, Daffodil Delight, and finally Coastal Cabana.  I let dry and then flicked Wink of Stella all over it so it sparkles.  I know it's hard to see that in the photo. I then stamped the sentiment from A Grand Kid (new set coming June 3)

I took a small piece of Shimmery White cardstock and stamped the unicorn in Stazon.  Let dry well.  I then took Watercolor Pencils and a Blender Pen and colored the unicorn.  Do each color separately.  I then covered it all with Wink of Stella.  Once all dry I die cut it using the Layering Ovals dies.

The inside is decorated too!

The sentiment was stamped in Flirty Flamingo and also comes from A Grand Kid and Itty Bitty Birthdays.  I used a non-Stampin' Up! die to cut it out and then layered over a 5 1/4" x 4" piece of Flirty Flamingo cardstock.

I sure hope she likes it!

REMINDER:

All the current catalogs are ending June 2.  Many items are already sold out.  Stamp sets are guaranteed until May 22.  Please check your lists to see if there is anything you really want that is still available!  Don't miss out!


Product List


Graduation Cards, Part 3

Here are two more graduation cards I have to show you:

This card uses a Call Me Clover base of 8-1/2" x 5 1/2" scored at 4-1/4".  It requires 2 pieces of Whisper White 5-1/4" x 4". One piece is for the inside.  For the card front, lay the Ornate Borders die on the edge of the whisper white piece and diecut.  I used the precision plate with my Big Shot since it helps cut out all those little pieces.  I also used my Take Your Pick tool with the Brush attachment to clean out any left over pieces.

I stamped the sentiment onto the top of the diecut Whisper White piece and then I layered a piece of DSP from the Flowers for all Seasons (coming June 3) cut to 4 x 2-7/8 onto it.  

I die cut the numbers using the retired large numbers dies onto the retired glimmer paper (If you don't have those, you can use any number dies or glimmer paper/cardstock.) and then attached to the cardfront using mini dimensionals (some were cut in half).  

I did decorate the inside but neglected to take a photo.

The next card is more masculine but suitable for anyone.

The Country Club DSP was cut using a One Sheet Wonder template.  This template is super simple--just cut every piece 3"x4".  This will give you 12 cards out of one sheet of paper.  I used it simply on this card but will be showing you additional cards (some with fun folds) in a future post.

This card has a Whisper White Thick base layered with a 5-1/4" x 4" embossed Call Me Clover layer.  I layered the DSP piece onto Night of Navy cut to 3-1/4" x4-1/4".  I had a little 1/4" x 4" strip of green cardstock left from cutting out my layers and put that in the middle over the center.

The sentiment was stamped on whisper white cardstock and cut out using the Ornate Frames dies.  Color the hat with Blends.  I then cut out another one in navy.  To layer the two pieces, I cut the navy one in half and put behind the white piece.  Adhere to the card using dimensionals.

Enjoy!


Product List


Graduation Cards,part 2

Here are more Graduation Cards I made for my niece to give out.  These two are the same fun-fold of the previous ones (so if you need instructions, please scroll down to that post!)


As you can see, this card opens horizontally instead of vertically.  You just have to make sure you are adding your adhesive on the correct side!  

The pretty papers (DSP) used on this card are the In-Colors DSP as well as the brand new (available June 3) Flowers for Every Season.  This floral paper is actually the back side of the yellow and green papers on the card I showed before.  

I love to make the insides as pretty as the outsides and for this card I used the Ornate Frames Dies (available now but in the new catalog).


This Lily Pad card uses DSP from Sale-a-Bration that is no longer available but you can use whatever paper you have.  I colored the lilypad with Blends onto whisper white cut out with the Stitched Rectangle Dies.

I have two more cards to show you in my next post.


Product List


Graduation Cards

My niece has a daughter who is graduating this month and she asked me to make some graduation cards to give to her classmates.  With all this Covid-19 mess, graduations are going to have to be made as special as possible since there will be no ceremony, parties, trips, etc.  That's so sad, They even had a virtual prom.  

Her school's colors are kelly green and white so I pulled out my Call Me Clover cardstock, DSP and ink.  All these things are part of the 2018-2020 In Colors so are retiring at the end of the month.  Most are gone already.  

I have a series of cards I will be sharing but wanted to show you the first 3 I designed.  
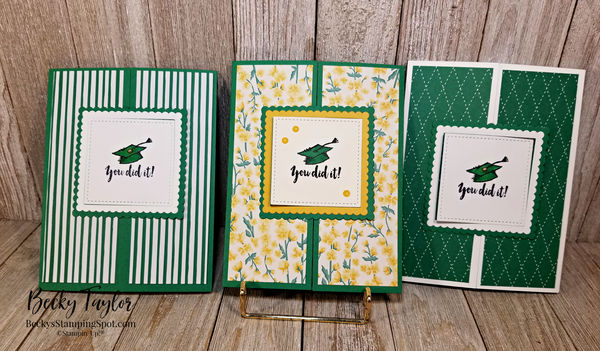
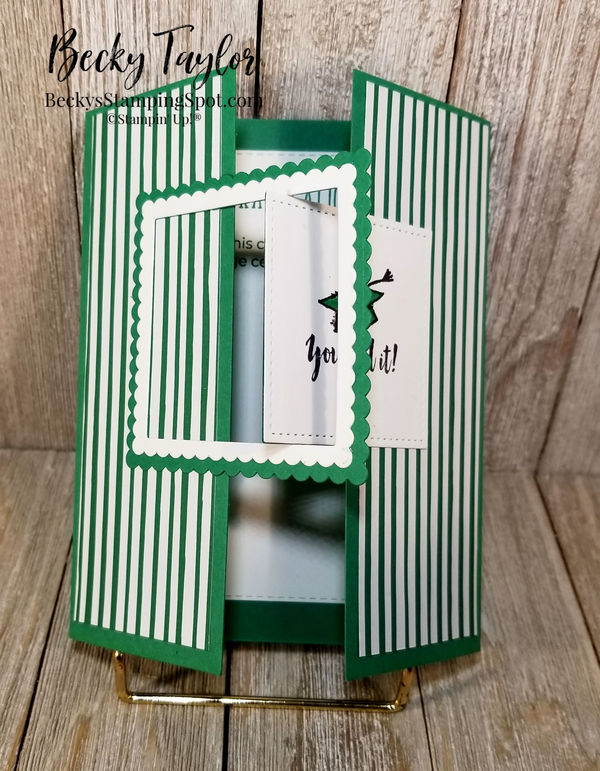
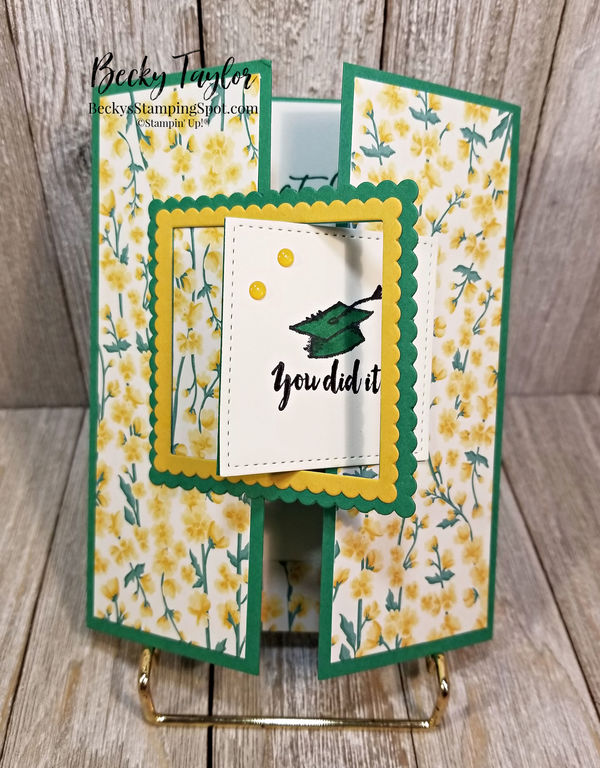
These cards feature a fun fold and I'm not sure what it is called "officially".  I'm not even sure I can adequately describe how to do it!  But I will try.

I started by making a gatefold card.  The base is 5 1/2" x 8 1/2" and scored at 2 1/8" from each side to create the gatefold.  Be sure and use your bone folder to get crisp lines to keep it shut! I used Whisper White Thick or Call Me Clover cardstock for the bases.  I then added DSP cut to 5 1/4 x 1 7/8.  (the DSP was 6x6 so I first cut off the bottom all the way across at 5 1/4--we'll use that little 3/4" piece later)

I die cut the stitched square using Whisper White cardstock.  Because I was using both green and white "frames" (as well as Bumblebee and Very Vanilla) from the Layering Squares, I layered the squares first and then cut out. 


This will create the smaller and larger frames that go on the front.  I made these in white, Call Me Clover, and Bumblebee.  I also just made some white squares and a very vanilla square.  Since I am making multiples of the cards, I needed more than just one or two.

I stamped the sentiment from Witty-cisms onto the square (either white or very vanilla) using Memento Tuxedo Black ink.  I let it dry well and then colored in the mortarboard (graduation cap) with Call Me Clover Blends.  I then attached that square onto another square (either white or green depending on the card) lining them up perfectly.

Layer the two frames, smaller on top of larger one, lining up perfectly to leave the square space in the center,  You can choose whatever color works best on top or bottom.  I used multipurpose glue (small amounts) on the two.  You could also just use one frame (if so, make it the bigger frame) if you want.  Set aside to dry.

Centering the square onto the card front, I attached ONE SIDE ONLY--just add snail or glue to half the square so it is glued only on one half of the gatefold.  If you add adhesive all over, you will glue the card shut!  Let dry (if you are using glue).

Put the frames around that glued down square, fitting the square into it firmly.  You can now open up that side of the card and you'll see the back of the frame on one side.  Put some glue JUST ON THE FRAME THAT IS SHOWING and close the card, letting the glue dry. 

Now you can open the card so that the square pulls through the frame.


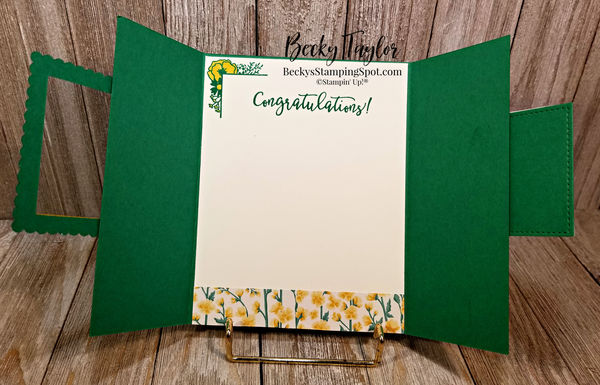
If the card was on the green cardstock, I put white (or very vanilla) inside for the sentiment.  Here is where you can use that little 3/4" strip of paper you cut off.  You can add to the side or bottom of the inside.


The card with the stripes had stripes running down both sides of the center.  For the Very Vanilla inside with the yellow flowers, I stamped the corner piece from I Say Hello in Call Me Clover and then used Blends to color in the flowers.

I hope that I have adequately described how to do this.  If you have any questions, just ask!

I have some additional cards using this same technique as well as some other cards (using a One Sheet Wonder template) to share with you in a couple of days.

FYI:  The yellow and green paper above as well as the Bumblebee cardstock will be available June 3 in the new catalog.

Product List